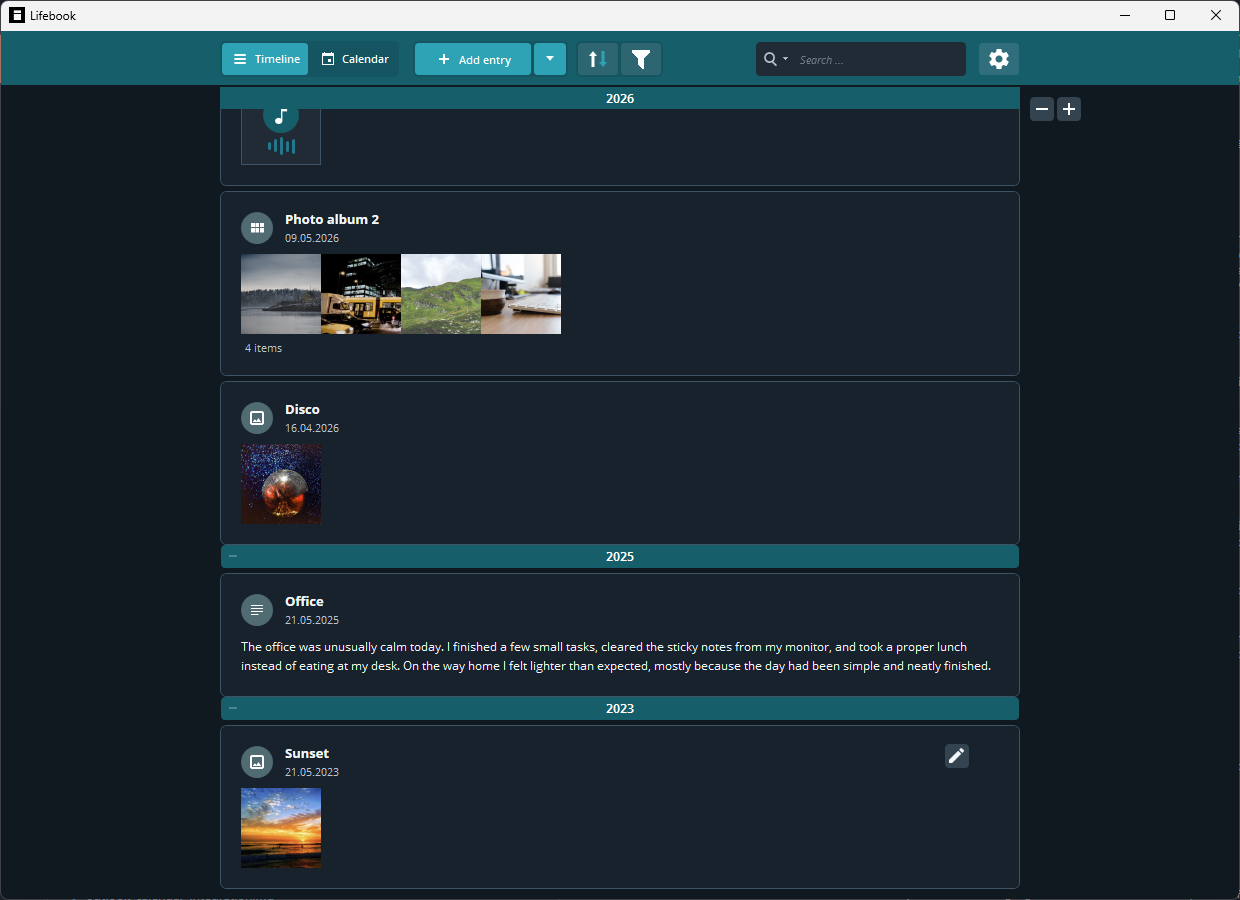
Settings
Open Settings with the gear button in the main menu.
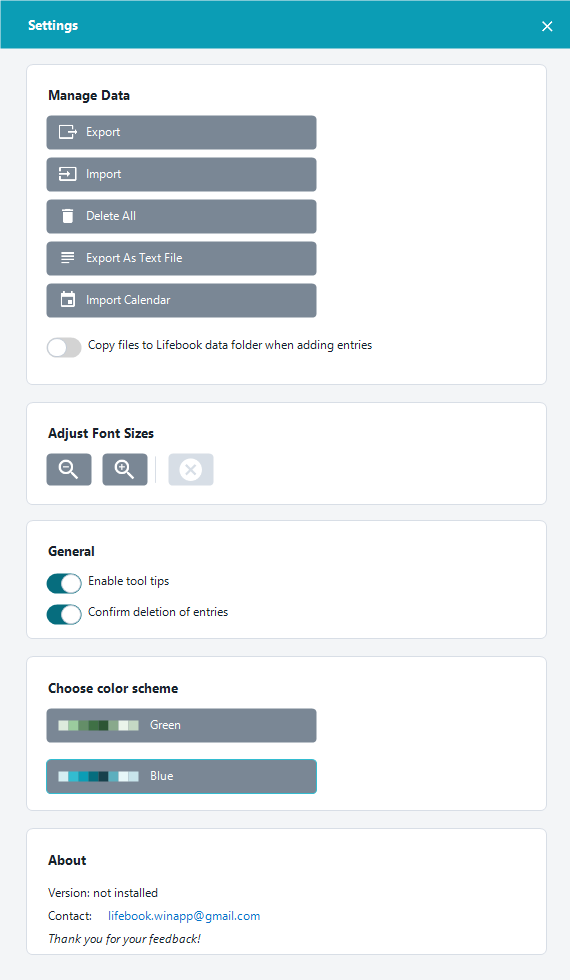
Settings opens as a dialog over the current view. Close it with the close button or by clicking outside the panel. Export, import, and copy operations can block close until they finish.
The left column contains the settings categories. Selecting a category shows only that category in the right pane. Use the search box to filter categories and settings; when the search box is focused, Esc clears the current search first, and a second Esc closes Settings.
On this page: General · App Statistics · Manage Data · Copy Files · Calendar Import · Appearance · User Manual · About
General
General settings include:
Enable tool tipsConfirm deletion of entries
When deletion confirmation is disabled, deleting individual entries does not show the usual confirmation dialog. Some larger destructive actions, such as deleting all entries or deleting a whole year, still ask for confirmation.
App Statistics
App statistics gives you a quick, friendly overview of what is stored in Lifebook. It shows:
- Total entries saved on your timeline.
- Words written in text entries.
- Images, including images stored inside photo albums.
- Files saved inside photo albums.
- The entry mix for text, image, video, audio, and photo album entries.
The numbers are informational only. They do not change your data or usage limits.
Manage Data
Use Export and Import to back up and restore your Lifebook data. Use Export As Text File to create a readable document you can share or print.
Export
Exports a Lifebook backup file. Use this when you want a copy that can later be imported back into Lifebook.
Import
Imports a Lifebook backup file.
Warning
If your Lifebook already contains entries, importing a backup overwrites all current data. Export a backup first if you want to keep it.
Delete All
Deletes all entries from the current Lifebook after confirmation.
Export As Text File
Opens the document export dialog. You can export entries as PDF, Word, HTML, or text documents.
See Export Entries as Documents.
Clean Up Thumbnails
Removes generated thumbnail files that are no longer used by any entry. The button is enabled only when Lifebook finds unused thumbnails.
Import Calendar
Imports .ics or .vcs calendar files as text entries.
Outlook Calendar Integration
When supported on the device, Show entries in an Outlook calendar. creates or updates a Lifebook calendar in Outlook. Lifebook can add entries to that calendar and open entries back in Lifebook from calendar links.
Turning the option off removes the Lifebook Outlook calendar.
If Outlook calendar setup fails, Lifebook restores the checkbox state and shows the error in the status area.
Copy Files to Lifebook Data Folder
The checkbox Copy files to Lifebook data folder when adding entries controls whether Lifebook stores its own copy of binary files such as images, videos, and audio.
When enabled:
- New binary entries are copied into Lifebook's data folder.
- Lifebook is less likely to lose track of files if originals are moved.
- Existing imported binary files can be copied too, after confirmation.
- Lifebook shows the data folder location.
When disabled:
- Lifebook references files where they are.
- Moving or deleting original files can cause
File not foundmessages.
Note
If there is not enough free disk space to copy existing files, Lifebook cancels the operation and shows a message. The setting stays unchanged.
What Happens When You Delete an Entry
Deleting an entry removes its record from Lifebook. Files that Lifebook references from their original location on disk are never deleted by Lifebook.
Appearance
Appearance contains text size, app theme, and color scheme controls.
Adjust Font Sizes
Use the font size buttons to change app text size:
- Decrease
- Increase
- Reset to default
Keyboard shortcuts:
Ctrl+-: decreaseCtrl++: increaseCtrl+0: reset
Buttons are disabled when the current size is already at the minimum, maximum, or default value.
App Theme
Choose System to use the current Windows app theme and update if Windows switches between light and dark mode while Lifebook is open. Choose Light or Dark to override Windows manually.
Dark mode changes Lifebook's surfaces, dialogs, menus, and text areas to a dark appearance. Your blue or green color scheme remains unchanged.
Color Scheme
Choose between:
- Green
- Blue
The selected theme applies to main menu accents, selected states, tags, calendar entries, and other highlight colors.
About
The About section shows:
- App version
- User manual link
- Welcome guide link
- Purchase button when running in trial mode
- Contact email
- Feedback thanks message
The purchase button is only shown when it is available, and connects to the Microsoft Store.
User Manual
The user manual entry gives quick access to this help:
Open manual: opens the Lifebook manual in your browser.
The welcome guide is a separate entry:
Show welcome guide: closes Settings and shows the first-run welcome guide again.